
You will need: Cardstock, magnetic tape (from Walmart in a duct-tape-roll-kind-of-format). Mod Podge, a gluestick, scrapbook paper, a ruler, scissors, and yes, paint.
1. Get out your cardstock. Use a stencil or with fantastic improvisation, cut out two rounded rectangles. The size and shape to match an iPhone is ideal.
2. After cutting out the cardstock, paint it. I chose lipstick red for mine.
3. Get some scrapbook paper. Cut two rounded rectangles out of the paper, and with your gluestick, stick the scrapbook paper to the back of the cardstock. Be sure to press down and smooth over your project with diligence so that the inside scrapbook paper doesn’t “peel off” later due to a weak adhesive.
4. Apply a layer of Mod Podge to the painted side of your cardstock bookmark. Let dry. This should be no problem as folding the cranes may be time consuming, depending on your folding abilities.
5. With scrapbook paper, cut out squares (and you would do this with a ruler). I chose to do tiny paper cranes, so my squares were 1.5” by 1.5”. In total, I folded 18 cranes (9 on each bookmark), and it took me a good two hours. Why? Because I’m such an inept folder.
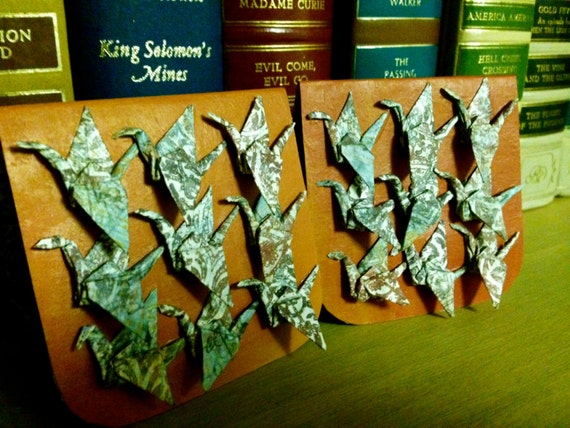
6. Refer to my DIY with the cranes in the glass candle holder (they’re resting on rocks and are sheltered by a lid painted red). I’ve included a link on how to fold paper cranes. With the scrapbook squares you’ve newly snipped, make some cranes. For my bookmarks, I made 18. 9 on each bookmark, I repeat. By the time you are done, the Mod Podge applied to the painted side of your cardstock bookmarks should already be dry.
7. Some paste the cranes on the bookmark with Mod Podge. I choose to first glue them with the Elmer’s Gluestick. You want to be very careful either way as the paper is already quite delicate and you don’t want to shred or rip your cranes. After I glued each crane on the cardstock, I applied a layer of Mod Podge, both to the cranes and the painted surface one again, in between.
8. Apply two more layers of Mod Podge to fortify the cranes. Allow twenty minutes between each coat to dry. After the last coat, wait a good thirty minutes.
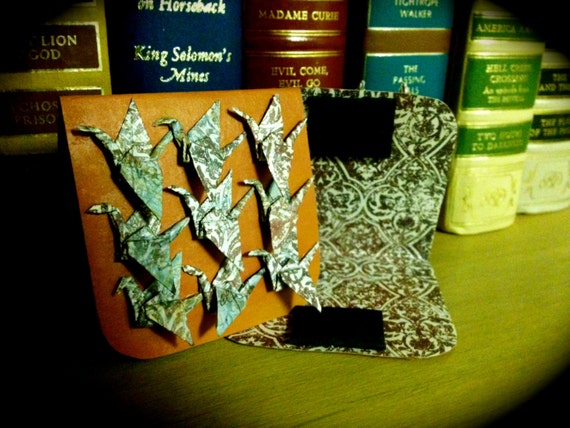
9. Cut out equal-sized strips of adhesive magnetic tape. The adhesive in itself is pretty weak. Glue each strip to the inside of the bookmark with superglue. This is what it should look like inside the bookmark:
10. Allow an hour for the glued magnetic strips to dry.
TIP: For added longevity, you may want to coat your bookmarks (the outside only!) with acrylic sealant spray (clear and glossy, perhaps?).
Ultimately, enjoy. These make great gifts, as well as simple time soakers to calm your nerves and add charm to your books!

Such a cute idea!
XOXO,
Isabella
LikeLike
This is great! Love it, doing this tutorial ASAP when time allows. So clever!
LikeLiked by 1 person
Thanks! I want to see how your bookmarks turn out! Also, note that it can be time consuming if you’re doing small cranes. Because I actually cut out the squares to make the cranes, and I’m not really good at cutting in straight lines to where each side is of equal length… so the smaller the crane, the more time spent!
LikeLiked by 1 person